
WordPressはブログ用としてもシェアが多いですが,自宅サーバで運用するならPCから調達する必要があります。
基盤となるPCは使わなくなったPCを使用することもできますが、PCがなければ少しでも安く手に入れたいものです。
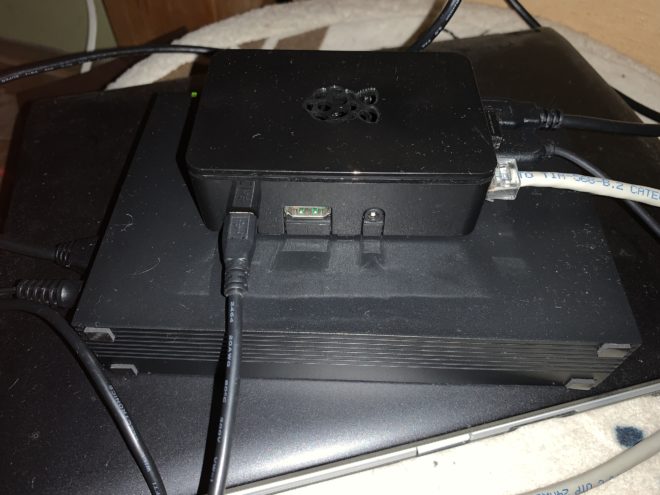
そこで、サバくんに何がいいのか聞いてみたらラズパイ(Raspberry Pi)が良いとの教えてくれました。
![[商品価格に関しましては、リンクが作成された時点と現時点で情報が変更されている場合がございます。]](https://hbb.afl.rakuten.co.jp/hgb/1feba0d1.7de5d8c8.1feba0d2.bad7b1c9/?me_id=1269553&item_id=12130016&pc=https%3A%2F%2Fthumbnail.image.rakuten.co.jp%2F%400_mall%2Fbiccamera%2Fcabinet%2Fproduct%2F3370%2F00000005241564_a01.jpg%3F_ex%3D240x240&s=240x240&t=picttext "[商品価格に関しましては、リンクが作成された時点と現時点で情報が変更されている場合がございます。]")

そういえば自宅サーバにWordPressを導入したいんだけど、いいものないかな??
それならラズパイがいいよ!
いらないPCに無料のOS入れてもいいけど、ラズパイの筐体(PC)とOSがついてるから初心者なら使いやすいと思うよ!
じゃあ今回はラズパイで構築してみるかな!
サバくんがラズパイ(Raspberry Pi)を推してくれたため、ラズパイのWordPress導入までをまとめてみました。
目次
1.スペック
今回利用したラズパイのスペックは下記となります。
・Distributor ID: Raspbian
・Description: Raspbian GNU/Linux 9.13 (stretch)
・Release: 9.13
・Codename: stretch
今回導入するものは下記です。
・MariaDB
・PHP
・WordPress
・Let’s Encrypt
2.インストール
それではラズパイにインストールしていきます
参考元はこちらとなります。
2-1.システムアップデート
まずはシステムアップデートを行います。
すでにラズパイに様々なソフトウェアをインストールをしていれば、依存関係が崩れて動かなくなる恐れがあるためアップデートを行わなくても良いですが、今回は何も入っていないため素直に行います。
$ sudo apt update -y
$ sudo apt upgrade -y
$ sudo reboot
2-2.apache webサーバのインストール
つぎにwebページを構築するwebサーバを構築していきます。
$ sudo apt install apache2 -yインストールが完了したらバージョンも確認しましょう。
$ apache2 -v
Server version: Apache/2.4.25 (Raspbian)
Server built:   2021-10-02T13:27:55
あわせて、webサーバに必要なパッケージもインストールします。
$sudo apt install lsb-release apt-transport-https ca-certificates -y2-3.GPGキーのダウンロードと保存と追加
インストール中に検証エラーが発生する場合があるため、検証ツールのGPKキーのダウンロードと、保存・追加をする。
$ sudo wget -O /etc/apt/trusted.gpg.d/php.gpg https://packages.sury.org/php/apt.gpg
$ echo "deb https://packages.sury.org/php/ $(lsb_release -sc) main" | sudo tee /etc/apt/sources.list.d/php.list
ツールをインストールしたため、「おまじない」のシステムアップデートを実施。
$ sudo apt update -y
$ sudo apt upgrade -y
$ sudo reboot
2-4.PHP7.4インストールと必要モジュールインストール
WordPressはPHPで稼働するため、PHP7.4をインストールする。
$ sudo apt install php7.4 -y完了したらバージョンの確認を行う。
$ php -v
PHP 7.4.26 (cli) (built: Nov 22 2021 09:47:48) ( NTS )
Copyright (c) The PHP Group
Zend Engine v3.4.0, Copyright (c) Zend Technologies
with Zend OPcache v7.4.26, Copyright (c), by Zend Technologies
最後にWordPresに必要なモジュールをインストールする。
$ sudo apt install php7.4-curl php7.4-json php7.4-mbstring php7.4-mysql php7.4-imagick php7.4-xml php7.4-zi -y
$ sudo apt install php7.4-fpm -y
インストールが完了したら、設定ファイルを下記のように変更する。
$ sudo vi /etc/php/7.4/apache2/php.ini

[mbstring]
; language for internal character representation.
 ; This affects mb_send_mail() and mbstring.detect_order.
; http://php.net/mbstring.language
mbstring.language = Japanese   ;コメントアウト解除
~(略)~
memory_limit = 128M
;下記追加
post_max_size = 40M
upload_max_filesize = 30M
次に接続確認をするためにテストページを作成する。
$sudo vi /var/www/html/test.php
<?php
        		phpinfo();
?>
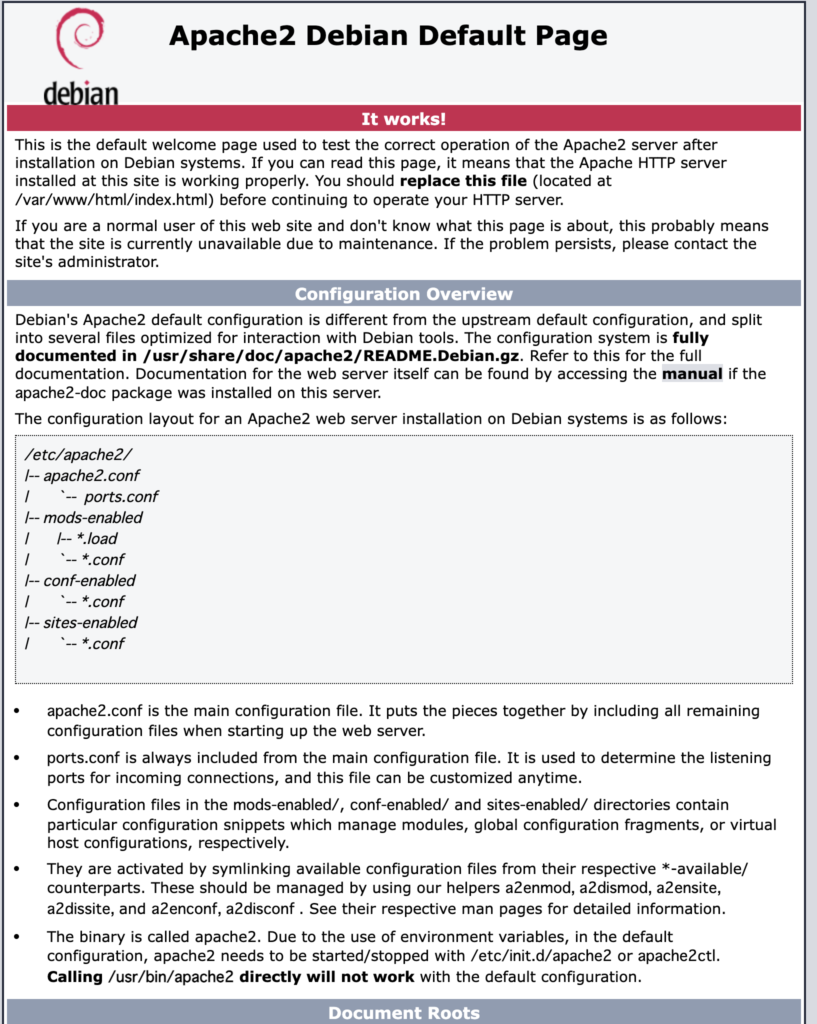
すべて完了したら作業PCからラズパイのIPを指定してapacheのデフォルトページが表示することを確認する。
2-5.Apacheの設定
サーバとドメインを紐付けたり、ドキュメントルート(webページを接続したときに最初に到達するページ)の設定を行う。
$sudo vi /etc/apache2/apache2.conf

# Global configuration
# Global configuration」のコメントの下に追記

ServerName www.ichikun.work  #今回はこちらのサーバの設定のため購入したドメインを記入
$ sudo vi /etc/apache2/mods-available/dir.conf
<IfModule mod_dir.c>
DirectoryIndex index.php index.html index.cgi index.pl index.xhtml index.htm
</IfModule>$ apache2ctl -t -D DUMP_MODULES | grep rewrite
$sudo a2enmod rewrite
Enabling module rewrite.
To activate the new configuration, you need to run:
systemctl restart apache2
$sudo systemctl restart apache2
$apache2ctl -t -D DUMP_MODULES | grep rewrite
rewrite_module (shared) ←shareになれば問題なし$ sudo vi /etc/apache2/apache2.conf
<Directory /var/www/>
Options FollowSymLinks #「Indexes」を削除
AllowOverride All #「All」に修正
Require all granted
</Directory>2-6. MariaDBのインストールと設定
WordPressにはDB(データベース)のMySQLが必要となります。
しかし、MySQL自体は有償となるため、オープンソースで運用されているMariaDBを使用して構築します。
$ sudo apt install mariadb-server -y$ sudo mysql -u root -p
Enter password:
Welcome to the MariaDB monitor. Commands end with ; or \g.
Your MariaDB connection id is 2
Server version: 10.1.48-MariaDB-0+deb9u1 Raspbian 9.11
Copyright (c) 2000, 2018, Oracle, MariaDB Corporation Ab and others.
Type 'help;' or '\h' for help. Type '\c' to clear the current input statement.
MariaDB [(none)]> quit
Byeインストールが完了したら、初期設定をします。
聞かれた文言についてはEnterかYを入力すれば問題ないです。
$ sudo  mysql_secure_installation
NOTE: RUNNING ALL PARTS OF THIS SCRIPT IS RECOMMENDED FOR ALL MariaDB
      SERVERS IN PRODUCTION USE!  PLEASE READ EACH STEP CAREFULLY!

In order to log into MariaDB to secure it, we'll need the current
password for the root user.  If you've just installed MariaDB, and
you haven't set the root password yet, the password will be blank,
so you should just press enter here.

Enter current password for root (enter for none):(パスワードを入力)
OK, successfully used password, moving on...

Setting the root password ensures that nobody can log into the MariaDB
root user without the proper authorisation.

Set root password? [Y/n] y
New password:
Re-enter new password:
Password updated successfully!
Reloading privilege tables..
 ... Success!


By default, a MariaDB installation has an anonymous user, allowing anyone
to log into MariaDB without having to have a user account created for
them.  This is intended only for testing, and to make the installation
go a bit smoother.  You should remove them before moving into a
production environment.

Remove anonymous users? [Y/n] y
 ... Success!

Normally, root should only be allowed to connect from 'localhost'.  This
ensures that someone cannot guess at the root password from the network.

Disallow root login remotely? [Y/n] y
 ... Success!

By default, MariaDB comes with a database named 'test' that anyone can
access.  This is also intended only for testing, and should be removed
before moving into a production environment.

Remove test database and access to it? [Y/n] y
 - Dropping test database...
 ... Success!
 - Removing privileges on test database...
 ... Success!

Reloading the privilege tables will ensure that all changes made so far
will take effect immediately.

Reload privilege tables now? [Y/n] y
 ... Success!

Cleaning up...

All done!  If you've completed all of the above steps, your MariaDB
installation should now be secure.

Thanks for using MariaDB!
次にWordPressで使用するDBのテーブルを作成します。
※赤字は各自で決めてください
$ mysql -u root -p
Enter password:
Welcome to the MariaDB monitor.  Commands end with ; or \g.
Your MariaDB connection id is 4
Server version: 10.1.48-MariaDB-0+deb9u1 Raspbian 9.11

Copyright (c) 2000, 2018, Oracle, MariaDB Corporation Ab and others.

Type 'help;' or '\h' for help. Type '\c' to clear the current input statement.

MariaDB [(none)]> CREATE DATABASE it_wordpress;
Query OK, 1 row affected (0.01 sec)

MariaDB [(none)]> flush privileges;
Query OK, 0 rows affected (0.01 sec)

MariaDB [(none)]> GRANT ALL PRIVILEGES ON it_wordpress.* TO "wp_user"@"localhost" IDENTIFIED BY "password";
Query OK, 0 rows affected (0.00 sec)

MariaDB [(none)]> flush privileges;
Query OK, 0 rows affected (0.00 sec)
2-7.WordPressインストール
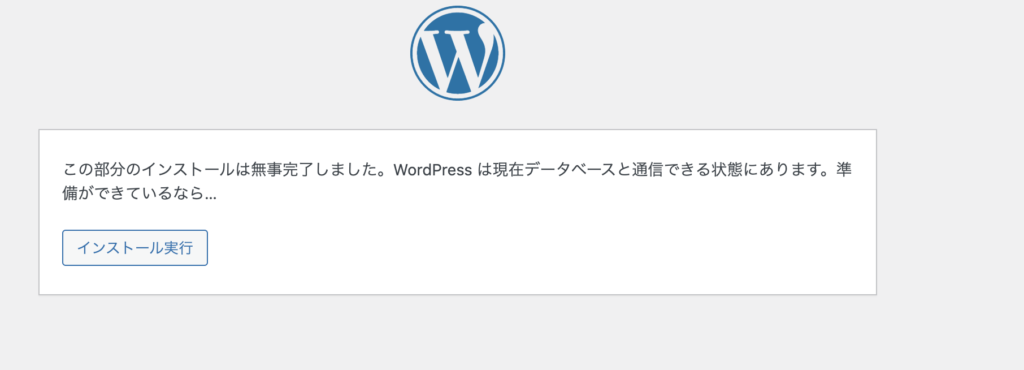
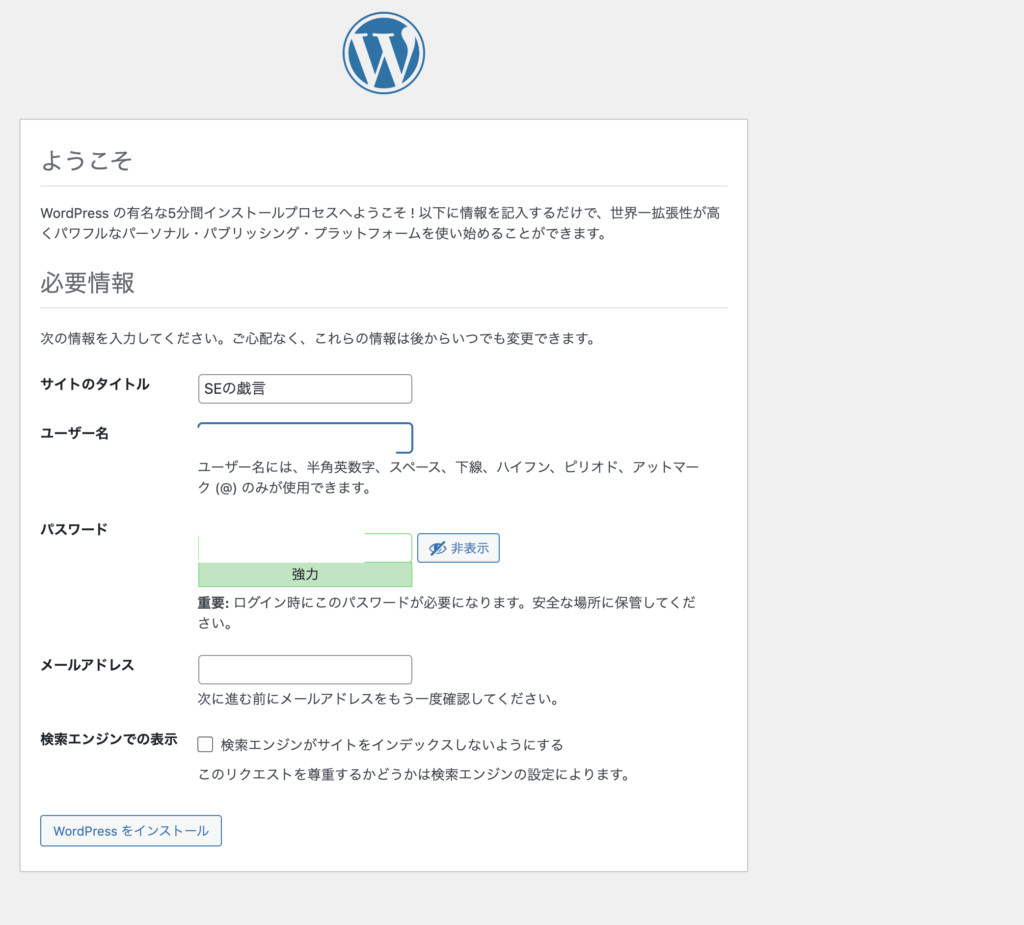
今回の根幹となるWordPressをインストールします。
この作業内で一般ユーザの読み書きを可能にするためにドキュメントルートの権限も変更します
$ wget https://ja.wordpress.org/latest-ja.tar.gz
$ tar -xzvf latest-ja.tar.gz
$ sudo cp -R ./wordpress/* /var/www/html/
$ sudo chown -R www-data:www-data /var/www/html/*
最後に作業PCから下記のように設定して完了です。
2-8.ルータ設定
ルータの設定を行わないと、外部からアクセスできなくなるため必ず行ってください。
ルータの機種によって操作が異なるため詳細は省きますが、「固定IPの設定」と「ポート転送」の設定は必須です。
家庭用ルータは「DHCP」の機能を使っているためIPアドレスが変更してしまいます。
そのため、「ラズパイはこのIPアドレスをずっと使用するんだぞ」っと覚えさせてIPが変更しないように設定します。
また,家庭用ルータは外部からのアクセスを拒否する設定をしています。
そのため,「転送設定」をして許可するようにする必要があります。
※443ポートと80ポートの設定は必ず行ってください
2-9.SSL設定
昨今は情報漏えいなどの観点からセキュリティにうるさい世の中になりました。
そのため、web版のセキュリティ対応であるSSLの対応を行わないとGoogleなどの検索サイトから除外されることが多くなりました。
しかし、SSLの対応をするとかなりのお金がかかってしまうため、個人ブロガーは少しでも安く抑えたいところです。
そのため、今回導入するSSLは無償で行うことができる「Let’s Encrypt」で鍵を取得します。
$ sudo apt install certbot -y
$sudo certbot certonly

Saving debug log to /var/log/letsencrypt/letsencrypt.log

How would you like to authenticate with the ACME CA?
- - - - - - - - - - - - - - - - - - - - - - - - - - - - - - - - - - - - - - - -
1: Spin up a temporary webserver (standalone)
2: Place files in webroot directory (webroot)
- - - - - - - - - - - - - - - - - - - - - - - - - - - - - - - - - - - - - - - -
Select the appropriate number [1-2] then [enter] (press 'c' to cancel): 2
Plugins selected: Authenticator webroot, Installer None
Please enter in your domain name(s) (comma and/or space separated)  (Enter 'c'
to cancel): www.ichikun.work (お名前.comなどで購入したドメインを記入してください)
Obtaining a new certificate
Performing the following challenges:
http-01 challenge for www.ichikun.work
Input the webroot for www.ichikun.work: (Enter 'c' to cancel): /var/www/html/ (ドキュメントルートを指定してください)
Waiting for verification...
Cleaning up challenges

IMPORTANT NOTES:
 - Congratulations! Your certificate and chain have been saved at:
   /etc/letsencrypt/live/www.ichikun.work/fullchain.pem
   Your key file has been saved at:
   /etc/letsencrypt/live/www.ichikun.work/privkey.pem
   Your cert will expire on 2022-03-03. To obtain a new or tweaked
   version of this certificate in the future, simply run certbot
   again. To non-interactively renew *all* of your certificates, run
   "certbot renew"
 - If you like Certbot, please consider supporting our work by:

   Donating to ISRG / Let's Encrypt:   https://letsencrypt.org/donate
   Donating to EFF:                    https://eff.org/donate-le
次にSSLの有効化を実施。
$ sudo a2enmod ssl
Considering dependency setenvif for ssl:
Module setenvif already enabled
Considering dependency mime for ssl:
Module mime already enabled
Considering dependency socache_shmcb for ssl:
Enabling module socache_shmcb.
Enabling module ssl.
See /usr/share/doc/apache2/README.Debian.gz on how to configure SSL and create self-signed certificates.
To activate the new configuration, you need to run:
  systemctl restart apache2
$ sudo a2ensite default-ssl
Enabling site default-ssl.
To activate the new configuration, you need to run:
systemctl reload apache2ここで接続できるか確認したところ、接続できていないことが判明しました。
どうやらApacheと連携がうまくできていないため、設定内容の追加を実施する。
$ sudo apt-get install python-certbot-apache -y
$ sudo certbot --apache
Saving debug log to /var/log/letsencrypt/letsencrypt.log
Plugins selected: Authenticator apache, Installer apache
No names were found in your configuration files. Please enter in your domain
name(s) (comma and/or space separated)  (Enter 'c' to cancel): www.ichikun.work
Cert not yet due for renewal

You have an existing certificate that has exactly the same domains or certificate name you requested and isn't close to expiry.
(ref: /etc/letsencrypt/renewal/www.ichikun.work.conf)

What would you like to do?
- - - - - - - - - - - - - - - - - - - - - - - - - - - - - - - - - - - - - - - -
1: Attempt to reinstall this existing certificate
2: Renew & replace the cert (limit ~5 per 7 days)
- - - - - - - - - - - - - - - - - - - - - - - - - - - - - - - - - - - - - - - -
Select the appropriate number [1-2] then [enter] (press 'c' to cancel): 1
Keeping the existing certificate
Created an SSL vhost at /etc/apache2/sites-available/000-default-le-ssl.conf
Deploying Certificate to VirtualHost /etc/apache2/sites-available/000-default-le-ssl.conf
Enabling available site: /etc/apache2/sites-available/000-default-le-ssl.conf

Please choose whether or not to redirect HTTP traffic to HTTPS, removing HTTP access.
- - - - - - - - - - - - - - - - - - - - - - - - - - - - - - - - - - - - - - - -
1: No redirect - Make no further changes to the webserver configuration.
2: Redirect - Make all requests redirect to secure HTTPS access. Choose this for
new sites, or if you're confident your site works on HTTPS. You can undo this
change by editing your web server's configuration.
- - - - - - - - - - - - - - - - - - - - - - - - - - - - - - - - - - - - - - - -
Select the appropriate number [1-2] then [enter] (press 'c' to cancel): 2
Redirecting vhost in /etc/apache2/sites-enabled/000-default.conf to ssl vhost in /etc/apache2/sites-available/000-default-le-ssl.conf

- - - - - - - - - - - - - - - - - - - - - - - - - - - - - - - - - - - - - - - -
Congratulations! You have successfully enabled https://www.ichikun.work

You should test your configuration at:
https://www.ssllabs.com/ssltest/analyze.html?d=www.ichikun.work
- - - - - - - - - - - - - - - - - - - - - - - - - - - - - - - - - - - - - - - -

IMPORTANT NOTES:
 - Congratulations! Your certificate and chain have been saved at:
   /etc/letsencrypt/live/www.ichikun.work/fullchain.pem
   Your key file has been saved at:
   /etc/letsencrypt/live/www.ichikun.work/privkey.pem
   Your cert will expire on 2022-03-03. To obtain a new or tweaked
   version of this certificate in the future, simply run certbot again
   with the "certonly" option. To non-interactively renew *all* of
   your certificates, run "certbot renew"
 - If you like Certbot, please consider supporting our work by:
最後に鍵の更新忘れ防止のために適宜実施するスクリプトを作成し、crontabで設定する。
$vim /etc/cron.monthly/letsencrypt
#!/bin/sh

certbot renew --deploy-hook "service apache2 restart"
$crontab -e
#最終行に追加
00 12 01 * * root /etc/cron.monthly/letsencrypt >/dev/null 2>&13.さいごに
今回はラズパイ構築について実施してみましたがいかがでしたでしょうか。
一部設定ミスをしている部分もありましたが、初心者でも半日あればWordPressを立ち上げられると思うので是非試してみてください。